Maskcara Makeup and Minimalism
Being somewhat of a minimalist, I like to pride myself in having a small amount of makeup. My philosophy with makeup is this: I keep just enough to make me feel truly beautiful in every situation, and no more. I wrote one of my first blog posts on my minimalist makeup routine and since then my makeup bag has gotten a complete makeover with the entrance of my new favorite makeup line Maskcara.

Maskcara Makeup is a great choice for minimalists, moms, and everyone in between. Because of the IIID foundation process, I’ve been able to cut down the amount of items in my makeup bag and the time I spend in front of the bathroom mirror.

What drew me to the product was the magnetic compacts and high quality ingredients. I have the quad compact, which is one of their smaller compacts. The quad compact fits 4 tins of makeup which you can replace as you run out. I love that I don’t have to buy a whole new palette every time I run out of one color. The ingredient list on the makeup is also pretty minimal, meaning you aren’t putting a lot of yucky scary stuff on you face. Call me crazy, but my acne actually cleared up when I started using this makeup.
If you want to find out more about the product, you can visit their website here
Today I’m breaking down step by step how I apply my makeup. If you want to actually see me do my makeup, follow me on Instagram @brittany.talbert3 I frequently share easy to follow makeup tutorials.
Step one:

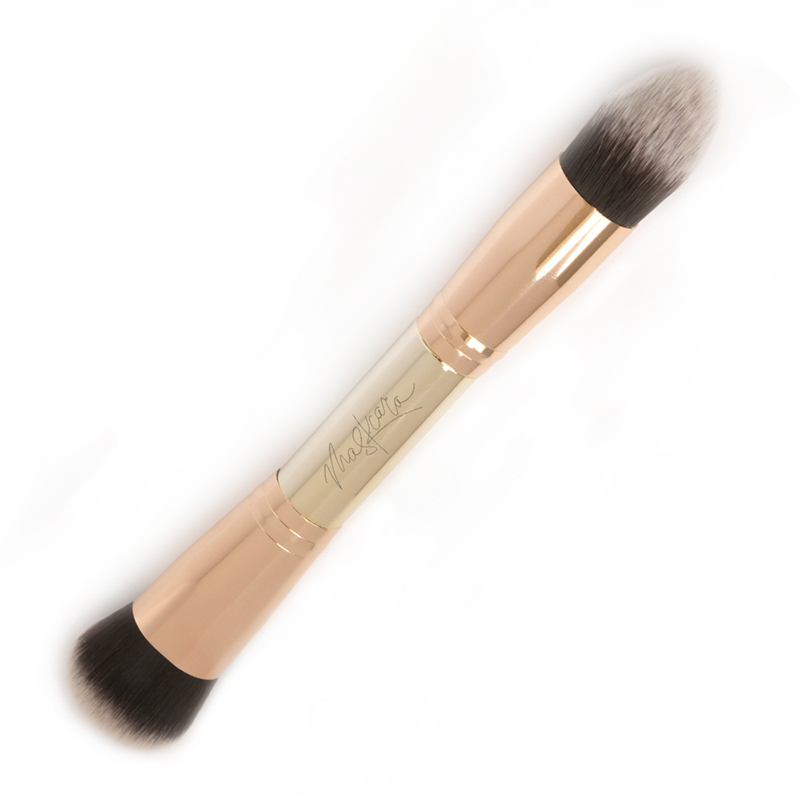
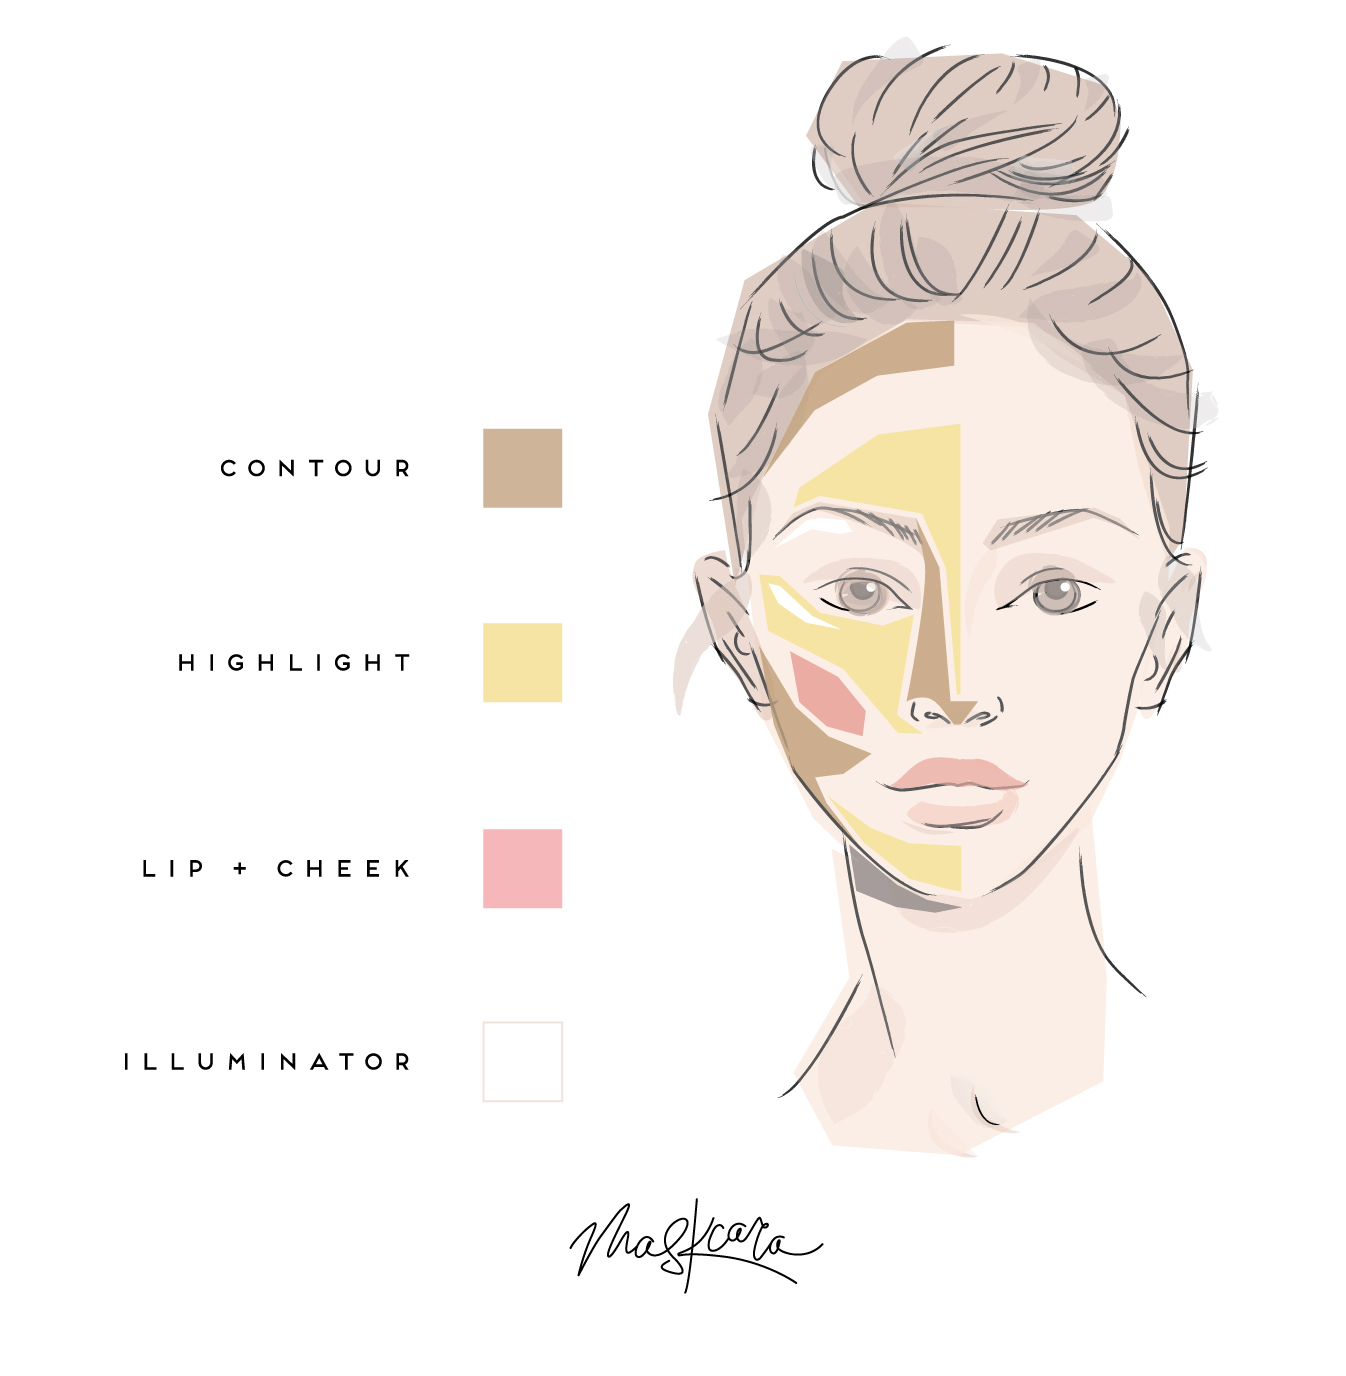
Apply the highlight shade all over, focusing on the high points of your face. I like to use the fluffy end of the 30 second hac brush. The shade I use is white peach. The creamy consistency and high pigmentation of this makeup means you don’t need a lot of product to cover your whole face. I also love that their brushes are double ended. It takes up a lot less space in my makeup bag, and makes switching brushes so much faster.
Step two:

Next comes contour. I use the pointed end of the 30 second hac brush to apply my contour to the sides of my nose, my eyelid creases, just under my cheek bones, and around the edges of my face to help slim down my pregnant face and add some structure. At this point I don’t worry too much about blending, I’ll do this later when I apply my setting spray. I love the ash contour color.
Step three:


Using the round end of a beauty blender I apply a little bit of my lip & cheek color to the apples of my cheeks. I like using the sponge because it makes it softer and more natural looking, without having to blend a ton. My favorite lip & cheek shade is nude.
Step four:


While I still look like I have stripes all over my face, I fill in my brows. For this I use the spoolie end of the know your angles brush. I start by grooming out the crazy and getting them all lined up. Then I go in with the Japonesque dual ended brow pencil in dark brown. I start by outlining my brows using the thicker end of the pencil and then I fill in the middle section with the smaller end. I finish off by using the spoolie again to blend it all out.
Step five:

Once my brows are done, I’m ready to blend & set my makeup. I spritz the Stay spray from Maskcara all over my face and use my beauty blender to blend my makeup and press the stay spray into my skin. This step is crucial for getting the makeup to last all day and creating a beautiful soft skin like texture.
Step six:

Now that we’ve added coverage and structure, we can add a little bit of shimmer. I have a powder highlighter from Mirabella that I reformed into an old Maskcara makeup tin. I don’t remember what the color is, but it’s really similar to this one from Maskcara. I apply the illuminating shade to the highest points of my cheek bones, the inner corners of my eyes, my brow bone, the tip of my nose, cupids bow, and occasionally my eye lid for a touch of extra sparkle.
Step seven:

Next I apply a few coats of mascara to my top lashes. I’ve been using the L’Oreal Voluminous Mascara, and I like it, but I am on the hunt for a really good mascara. If you have a favorite, let me know in the comments below.
Step eight:
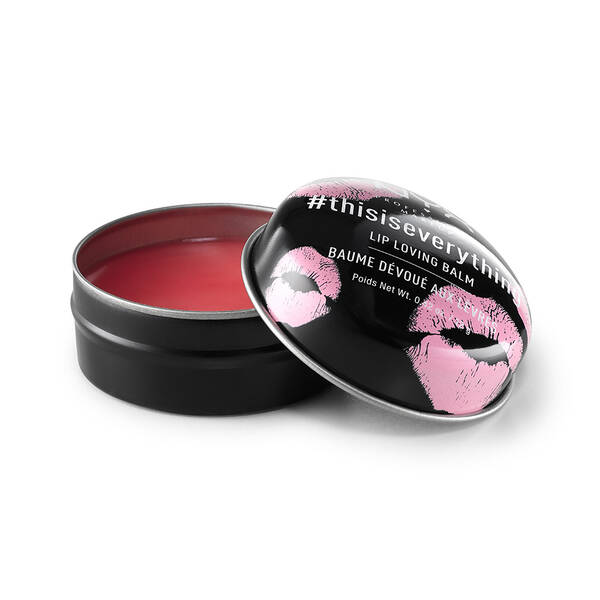
I finish the whole look off with my lips. I mix the Nyx This is Everything lip balm with the Nude lip and cheek color from Maskcara and just a touch of illuminator. It makes the perfect neutral lip color.
The whole process takes me roughly 10 minutes and looks very natural and beautiful. The first 3 steps take about a minute each, and most of the time is actually spent perfecting my brows and applying mascara. It's quick, easy, and takes up very little space in my bathroom. I seriously love this makeup.
If you want to get color matched to try the makeup yourself fill out this form here

Maskcara Makeup is a great choice for minimalists, moms, and everyone in between. Because of the IIID foundation process, I’ve been able to cut down the amount of items in my makeup bag and the time I spend in front of the bathroom mirror.

What drew me to the product was the magnetic compacts and high quality ingredients. I have the quad compact, which is one of their smaller compacts. The quad compact fits 4 tins of makeup which you can replace as you run out. I love that I don’t have to buy a whole new palette every time I run out of one color. The ingredient list on the makeup is also pretty minimal, meaning you aren’t putting a lot of yucky scary stuff on you face. Call me crazy, but my acne actually cleared up when I started using this makeup.
If you want to find out more about the product, you can visit their website here
Today I’m breaking down step by step how I apply my makeup. If you want to actually see me do my makeup, follow me on Instagram @brittany.talbert3 I frequently share easy to follow makeup tutorials.
Step one:
Apply the highlight shade all over, focusing on the high points of your face. I like to use the fluffy end of the 30 second hac brush. The shade I use is white peach. The creamy consistency and high pigmentation of this makeup means you don’t need a lot of product to cover your whole face. I also love that their brushes are double ended. It takes up a lot less space in my makeup bag, and makes switching brushes so much faster.
Step two:
Next comes contour. I use the pointed end of the 30 second hac brush to apply my contour to the sides of my nose, my eyelid creases, just under my cheek bones, and around the edges of my face to help slim down my pregnant face and add some structure. At this point I don’t worry too much about blending, I’ll do this later when I apply my setting spray. I love the ash contour color.
Step three:
Using the round end of a beauty blender I apply a little bit of my lip & cheek color to the apples of my cheeks. I like using the sponge because it makes it softer and more natural looking, without having to blend a ton. My favorite lip & cheek shade is nude.
Step four:
While I still look like I have stripes all over my face, I fill in my brows. For this I use the spoolie end of the know your angles brush. I start by grooming out the crazy and getting them all lined up. Then I go in with the Japonesque dual ended brow pencil in dark brown. I start by outlining my brows using the thicker end of the pencil and then I fill in the middle section with the smaller end. I finish off by using the spoolie again to blend it all out.
Step five:
Once my brows are done, I’m ready to blend & set my makeup. I spritz the Stay spray from Maskcara all over my face and use my beauty blender to blend my makeup and press the stay spray into my skin. This step is crucial for getting the makeup to last all day and creating a beautiful soft skin like texture.
Step six:
Now that we’ve added coverage and structure, we can add a little bit of shimmer. I have a powder highlighter from Mirabella that I reformed into an old Maskcara makeup tin. I don’t remember what the color is, but it’s really similar to this one from Maskcara. I apply the illuminating shade to the highest points of my cheek bones, the inner corners of my eyes, my brow bone, the tip of my nose, cupids bow, and occasionally my eye lid for a touch of extra sparkle.
Step seven:
Next I apply a few coats of mascara to my top lashes. I’ve been using the L’Oreal Voluminous Mascara, and I like it, but I am on the hunt for a really good mascara. If you have a favorite, let me know in the comments below.
Step eight:
I finish the whole look off with my lips. I mix the Nyx This is Everything lip balm with the Nude lip and cheek color from Maskcara and just a touch of illuminator. It makes the perfect neutral lip color.
 |
| Before |
 |
| After |
The whole process takes me roughly 10 minutes and looks very natural and beautiful. The first 3 steps take about a minute each, and most of the time is actually spent perfecting my brows and applying mascara. It's quick, easy, and takes up very little space in my bathroom. I seriously love this makeup.
If you want to get color matched to try the makeup yourself fill out this form here


Comments
Post a Comment